
#1
Adding an accessory to a component
Description
This tutorial shows how component accessories are managed in SkyCAD.
Topics covered
Accessory, accessories, creating an accessory, saving an accessory to catalogue, assigning accessory part number, accessory layout.
Video version
NOTE: This tutorial video was created using an older version of SkyCAD.
Ribbon buttons' appearance and positions may differ if you're using version 1.3.25 or higher.
Thank you for your patience while we update this tutorial.
Related tutorials
- Assigning part numbers (2:23)
- Creating/modifying catalogue parts (4:49)
- Laying out accessories (1:00)
- Creating a component's layout view (10:31)
- Adding fuses to fuse holders (1:00)
Written version
Introduction
Accessories can be:
Added to components, connectors, cables, harnesses, locations, terminals, etc.
Assigned part numbers so they appear in BOMs
Represented by symbols on the schematic
Represented in location (panel) layouts
Added to parts in the catalogue, so when such a catalogue part is assigned to an object, the accessory is automatically included
Accessory not represented by a symbol
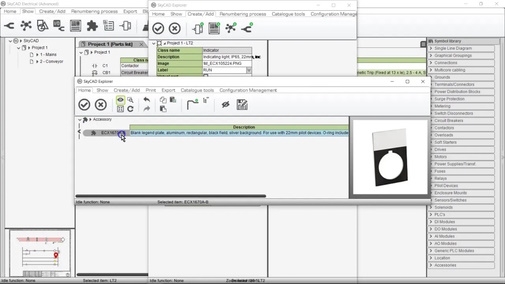
Examples of this include legend plates for pushbuttons or pilot lights, door-mounted circuit breaker handles, fuses, etc.
These accessories exist in the project and may even be laid out in a panel layout, but they are not directly represented by any symbols in the electrical schematics.
To add such an accessory:
Assign a catalogue part, if needed, to the main component (the component to which the accessory will belong), since assigning the catalogue part to the main component afterward will remove any accessories it has
Select the main component (via the tree view, parts list, or by double-clicking on the symbol), go to the Create/Add tab and select New Accessory
Choose the desired class/sub-class and click OK. The accessory will be added to the component and listed beneath it. (Accessory sub-classes can be created by following the principles in the Catalogue Tools tutorial.)
If needed, assign the accessory to a different location than that of the main component
If needed, assign a catalogue part to the accessory or create a new accessory catalogue part, just as you would for any other component
If you always want the main component to include that accessory, apply a Save to the main component which has the accessory. The next time you assign that main component catalogue part to a component, the accessory will be included.
If a catalogue part includes an accessory, but you do not want it to, delete the accessory from the main component, then apply a Save to the main component.
Accessory represented by a symbol
Auxiliary contacts for contactors and circuit breakers are examples of this.
These accessories exist in the project and are directly represented by a symbol(s) in the electrical schematics. They may also be laid out in a panel layout.
To add such an accessory:
Assign a catalogue part, if needed, to the main component (the component to which the accessory will belong), since assigning the catalogue part to the main component afterward will remove any accessories it has
Inserting the symbol
a. If the main component does not yet have the desired accessory:
i. Insert the symbol which will represent the accessory (see Accessory Symbols section below)
ii. Select the main component and click OK. This will simultaneously add an accessory to that component and link this symbol to the new accessory
b. If the main component already has the desired accessory:
i. Insert the symbol which will represent the accessory. This symbol must not be defined as an accessory (see Accessory Symbols section below)
ii. Link the symbol to the accessory of the main component
If needed, assign the accessory to a different location than that of the main component
If needed, assign a catalogue part to the accessory or create a new accessory catalogue part, just as you would for any other component. Be sure to define the proper pin numbers, layout view (if applicable), etc. just as you would for any other component
Accessory Symbols
The symbols in the Accessories symbol library folder are examples of symbols defined as accessories.
If you right-click on any of these symbols, choose Open Block and explore its properties, you will notice the Work Object Class property is set to the Accessory class, or a sub-class of the Accessory class.
This is what makes this symbol an accessory symbol.
Any symbol with its Work Object Class property set to the Accessory class, or a sub-class of the Accessory class, when inserted, will prompt you to select a component to which the accessory belongs. The accessory will be created and linked to the symbol.
Accessory symbols can be created using the standard symbol creation tools or with the block generator.
Simply select the appropriate Accessory class or Accessory sub-class when prompted to choose a class. This will set the symbol’s Work Object Class property accordingly.
Related tutorials
- Assigning part numbers (2:23)
- Creating/modifying catalogue parts (4:49)
- Laying out accessories (1:00)
- Creating a component's layout view (10:31)
Adding fuses to fuse holders (1:00)