#1
Linking symbols together
Description
This tutorial demonstrates how to link symbols together: e.g. making a contact symbol and a coil symbol belong to the same component.
Topics covered
Cross-references, link with, tag, link components.
Video version
NOTE: This tutorial video was created using SkyCAD Electrical version 1.3.25. Ribbon buttons' appearance and positions may differ from your version if it's older.
Related tutorials
- Inserting symbols (2:09)
- Navigation tools (4:24)
Written Version
Introduction
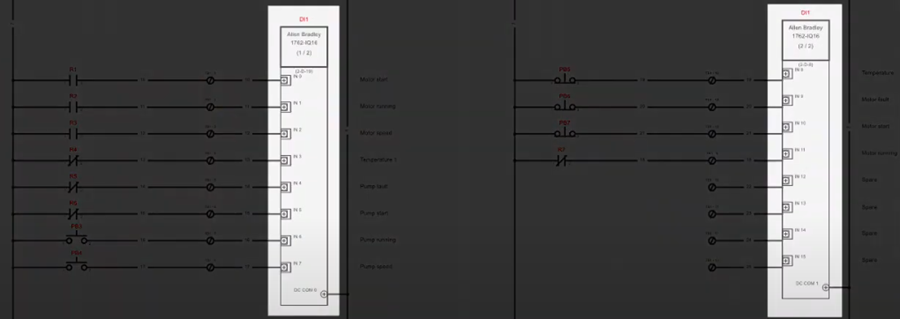
In most electrical schematics, you will find many cases where a component is represented by several different symbols spread-out over a project: e.g. a contactor represented by a coil and many contacts or a PLC module split in separate blocks.

Concept
Here is how this sort of situation is managed by SkyCAD.
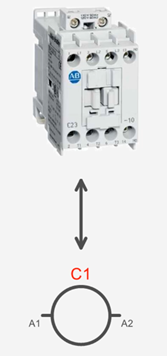
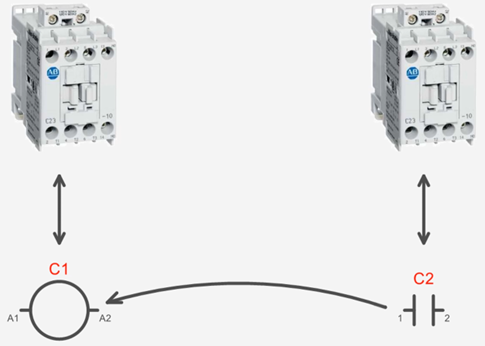
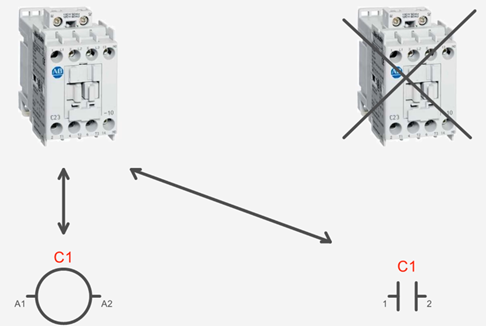
When you insert a symbol, SkyCAD creates a component in the background, and links the symbol to that component:
When you insert a second symbol, SkyCAD creates a separate component and links that symbol to it.:
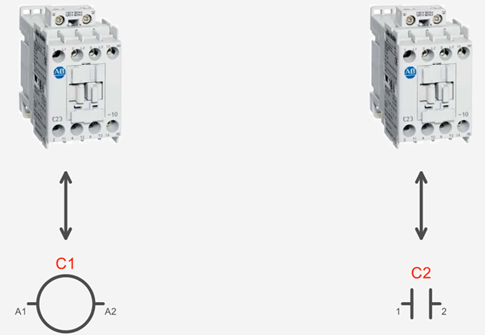
When linking one symbol to another, SkyCAD links both symbols to the same component and removes the component to which that symbol was originally linked:
There are several ways to link symbols to the same component:
Link inserted symbols together on the sheets (even if they’re on different sheets)
Link inserted symbol(s) to a component in the component list
Link inserted symbol(s) to a component in the tree view
During symbol insertion, link it to a component in the component list
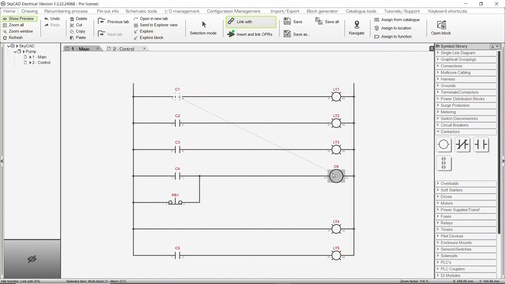
1. Link inserted symbols together on the sheets (even if they’re on different sheets)
Select the symbol (or symbols) you wish to link to a different component
Go to the Home tab and select Link With
Select the symbol which represents the component you want to link to
The symbols will be linked to the same component, and cross-references will be displayed
2. Link inserted symbol(s) to a component in the component list
Select the symbol (or symbols) you wish to link to a different component
Go to the Home tab and select Link With while holding SHIFT
A list of all components in the project will be displayed. Choose the desired component and click OK
The symbol(s) will be linked to that component, and cross-references will be displayed where applicable
3. Link inserted symbol(s) to a component in the tree view
Select the project in the tree view, go to the Show tab and select Components
Select the symbol (or symbols) you wish to link to a different component
Go to the Home tab and select Link With
Select the desired component in the tree view
The symbol(s) will be linked to that component, and cross-references will be displayed where applicable
4. During symbol insertion, link it to a component in the component list
Hold SHIFT when inserting a symbol on a sheet
A list of all components in the project will be displayed. Choose the desired component and click OK
The symbol(s) will be linked to that component, and cross-references will be displayed where applicable
Once symbols are linked, it will probably result with component tags that are out of sequence. SkyCAD’s renumbering process will solve that – go to the Renumbering Process tab and select Component Renumbering.
The default keyboard shortcut for Link With is F4.
Related tutorials
- Inserting symbols (2:09)
- Navigation tools (4:24)