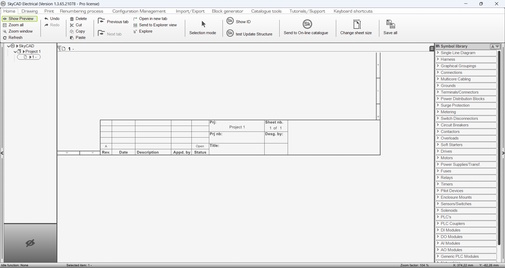
Creating a new title block
#1
Creating a new title block
Description
These tutorials cover how to create/modify title blocks using the Title Block Tools features.
Topics Covered
Create a title block, modify title block, title block creation, title block tools, title block attributes, title block coordinates, rung number, template, line number, company.
Video Versions
Modify/Use Existing Title Blocks
Create Title Block From Scratch
NOTE: This tutorial video was created using an older version of SkyCAD.
Ribbon buttons' appearance and positions may differ if you're using version 1.3.25 or higher.
Thank you for your patience while we update this tutorial.

Related Tutorials
Written Versions
Introduction
In SkyCAD, the title block consists of several elements:

- Drawing objects (e.g. lines and rectangles) which make up the framework of the title block
- Company information and logo
- Static text which never change (e.g. Rev, Date, Description, Title, etc.)
- Title block attributes which display project-specific information (e.g. project name, sheet title, revision number, etc.)
- Coordinates (the border around the sheet and the coordinate system: alphanumeric or rung/line numbering)
Modify/Use Existing Title Blocks
- Add a sheet of the size for which you would like to create a title block
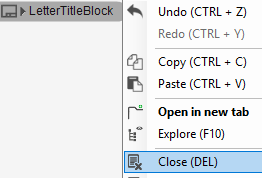
- Right-click on the title block and choose Open Block to open it in editing mode
- Go to the Drawing tab and activate Show sub grid and Snap to sub grid. This will make it easy to align your modifications, using the grid
- If you want to use this title block as a template to create your own, go to the Home tab and Save As. Give it a name and Save
- If not, and you are happy for the changes you are going to make to affect past, present and future instances of the title block, even if a project’s revision is closed, do not save yet
- In either case, you can now edit the title block as you wish
- Edit the existing lines and rectangles as you wish or add new ones using the drawing tools
- To add text which never changes, go to the Drawing tab, select Text, insert it where you want it, type in the Value field, and change the text styles if you wish, then click OK
- Add any other text you want in the same way or hit Esc to stop inserting text
- Existing text can be modified by double clicking on it and changing the properties
- To add a company logo, go to the Drawing tab, select Image, choose the image you want, insert it, and move it into position
- If you want to copy text styles from one text to another, select the text with the style you want, go to the Drawing tab, select Format Painter, then select the other text(s) you want to adopt the same style
- To add title block attributes which change automatically to display contextual information, go to the Title Block Tools tab and select Add Title Block Attribute
- Select the type of attribute you would like to add and click OK
- Select the property you want displayed and click OK. The attribute will be inserted at a default position. (If you do not see the attribute, ensure you have Show empty attributes active under the Drawing tab)
- Move the attribute to the desired position
- Continue adding title block attributes as needed
- As with text, the style can be changed by right-clicking the attribute and choosing Explore text or by using the Format Painter under the Drawing tab
- To modify the coordinate system, you need to place the title block onto a sheet, so at this point, close and save the title block
- SkyCAD will ask which library folder to save it to. Click Ok. If you do not have a Title Blocks symbol library folder yet, add one:
- Select the heading of the symbol library
- Go to the Create/Add tab, select Add library folder, and name it and click OK
- Expand the desired symbol library folder and click OK to save the title block to that folder
- On a sheet, delete the existing title block
- Insert the new title block from your symbol library just as you would insert any other symbol. It will snap to the nearest corner
- On the sheet, the default coordinate system associated with the title block will be visible
- To change the coordinate system, select the title block, go to the Title Block Tools tab and choose one of the three options closest to what you want; Use standard coordinates, Use one line numbering column, Use two line numbering column
- To edit coordinate format or numbering, double-click on the title block and edit the properties. If you need help, don’t hesitate to post on the forum
- To edit coordinate cosmetic appearance, select the Title Block Tools tab, and select Edit coordinates text properties
- Once you have made all the modifications you want, right-click on the title block and Save, clicking Yes when prompted to overwrite the file or not
- Finally, select the title block, go to the Title Block Tools tab and select Set title block as default for sheet size
- Choose the desired sheet size, click OK, and repeat as needed for the other sheet sizes for which you want this title block to be used
- If you modified the existing the title block (step 5 above) and want past, present and future instances of this title block to be affected, close and re-open the project to see the difference
To modify a title block, right-click on it, either on a sheet or in the symbol library, choose Open Block, make the modifications you want, then close and save the title block.
If that title block is used in your current project, close and re-open the project to reload the title blocks.
Create Title Block From Scratch
- Create a project and add a sheet of the size for which you’d like to create a title block
- Delete the title block on the sheet. Four corners will remain visible after this to indicate the sheet dimensions and position
- Draw the title block near the desired corner of the sheet using the Drawing tools
- Go to the Drawing tab and select Image to add your company logo
- Go to the Drawing tab and select Text to add static texts to the title block (the Drawing tools tutorial describes at 6:07 how to add texts and at 8:45 how to use the Format Painter to copy styles to other drawing objects such as texts)
- Select all objects in the title block, go to the Drawing tab and select Create title block. Alphanumeric coordinates will appear (which can be changed later) and the title block will be anchored to the nearest corner of the sheet
- If you want to change the coordinate system to rung/line numbering, select the title block, go to the Title Block Tools tab and select either Use one line numbering column or Use two line numbering column
- To customize coordinates, select the title block, go to the Title Block Tools tab and select Edit coordinates text properties (more coordinate customization can be done by double clicking the title block)
- Go to the Drawing tab and turn on Show empty attribute names
- Select the title block, go to the Title Block Tools tab and select Add title block attributes to add a dynamic text to the title block
- Select the type of attribute (folder, project, revision, etc.) you’d like to add and click OK
- Select the cell of the property you want and click OK. The attribute is inserted near the corner of the title block
- Move the attribute to the desired position
- If desired, customize the text by right-clicking on the attribute and choosing Explore Text (the Format Painter described in the Drawing tools tutorial at 8:45 can be used to copy styles from one attribute to another)
- Repeat until the title block is complete
- Select the title block, go to the Home tab, select Save As, name the file and save
- Select the title block, go to the Title Block Tools tab and select Set title block as default for sheet size
- Choose the sheet size for which you want this title block to be the default and click OK (this will only apply to new sheets, not existing sheets)
- Repeat steps 17-18 to add title block as default for multiple sheet sizes if desired
To replace the title block on an existing sheet with a different title block
- Select the Symbol Library heading:

- Go to the Create/Add tab and select Add library folder
- Name the folder something like Title Blocks. It will be added to the top of the Symbol Library
- Expand the new library folder: e.g. Title Blocks
- Go to the Home tab and select Add existing graphical object
- In the directory, go up one level to the graphical block folder
- Open the Title block folder and double-click on the title block file you want. It will be added to your Title Blocks folder in the Symbol Library
- Select the title block on the sheet and hit Delete
- Insert the title block in your Title Blocks Symbol Library folder just as you would insert any other symbol