Terminal connection point blocks
#1
Terminal connection point blocks
Description
In this tutorial, you’ll learn how to depict individual terminal junction connection ports using Terminal Connection Point Block symbols.
Terminal Connection Point Block symbols work similarly to how Connection Point Block symbols work, but Terminal Connection Point Block symbols are tailored for terminals.
Topics covered
Terminal connection point block, port, connect, side.
Main content
Standard terminal symbols depict both terminal junction connection ports with one symbol.
If you want to depict individual terminal junction connection ports with separate symbols, use Terminal Connection Point Block symbols.
These are the 3 different workflows terminal connection point blocks support:
Method 1 – Insert symbol, select terminal strip, add terminal, choose junction connection port
Method 2 – Terminal already exists in the terminal strip. Insert symbol, expand terminal strip, choose junction connection port
Method 3 – Copy/paste symbols to create new terminals
Note: in the past, if you were using V1.3.48 or earlier versions, please follow posts #7 and #8 of this forum thread to properly add this functionality into your environment. If, when you installed SkyCAD, it was already V1.3.49 or later, you need not follow that forum thread.
Method 1 – Insert symbol, select terminal strip, add terminal, choose junction connection port
Open the Terminals/Connectors library folder
Select a Terminal Connection Point Block symbol

Insert it onto a sheet
Select the desired terminal strip (add one via Create/Add tab if needed), go to the Create/Add tab and select New Terminal
Select the desired [Available] junction connection port cell, then click OK

The symbol is inserted and linked to that specific terminal junction connection port

Note: If you made a mistake and wish to link the symbol with a different junction connection port, select the inserted Terminal Connection Point Block symbol and select Link With from the Home tab.
Method 2 – Terminal already exists in the terminal strip. Insert symbol, expand terminal strip, choose junction connection port
Open the Terminals/Connectors library folder
Select a Terminal Connection Point Block symbol

Insert it onto a sheet
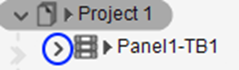
Select the arrow to the left of the terminal strip to expand it
Select the desired [Available] junction connection port cell, then click OK

The symbol is inserted and linked to that specific terminal junction connection port

Note: If you made a mistake and wish to link the symbol with a different junction connection port, select the inserted Terminal Connection Point Block symbol and select Link With from the Home tab.
Method 3 – Copy/paste symbols to create new terminals
- Copy inserted Terminal Connection Point Block symbols
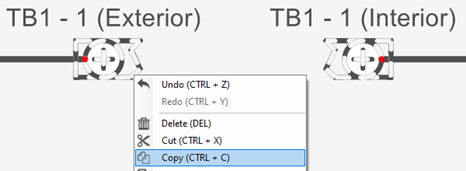
- Paste onto a sheet to create a new terminal of the same terminal strip.
The symbols are linked to the new junction ports, on the same levels and sides.
Note: Bridges in the terminal strip list view are copied too.
Note: If you made a mistake and wish to link the symbol with a different junction connection port, select the inserted Terminal Connection Point Block symbol and select Link With from the Home tab.
Important notes:
- Filter by Location, Disconnect, Connect and Resolve Connectivity don’t apply to junctions linked to Terminal Connection Point Block symbols because connectivity is determined directly by Terminal Connection Point Block symbols on schematics
- Terminal Connection Point Block symbols can be used for fuse and ground terminals too.
- When an inserted Terminal Connection Point Block symbol is deleted, the terminal junction is not deleted.
Related tutorials
- Introduction to terminal strips (6:57)
- Stacked terminals (3:35)
- Terminal strip layout (6:00)
- Terminal strip management (11:44)