Creating/modifying catalogue parts
#1
Creating/modifying catalogue parts
Description
This tutorial covers the different methods you can use to create and modify catalogue parts, so you can take advantage of the 'Assign from Catalogue' feature.
Topics covered
Catalogue part, creating a catalogue part, modifying a catalogue part, catalogue, part layout, parts-list, BOM.
Video version
NOTE: This tutorial video was created using an older version of SkyCAD.
Ribbon buttons' appearance and positions may differ if you're using version 1.3.25 or higher.
Thank you for your patience while we update this tutorial.
Related tutorials
- Assigning part numbers (2:23)
- Changing pin numbers (1:00)
- Block generator (8:22)
- Managing parts lists & BOMs (3:02)
- Catalogue tools (12:56)
- Pin-out blocks/attributes (3:00)
Written version
What is a catalogue part?
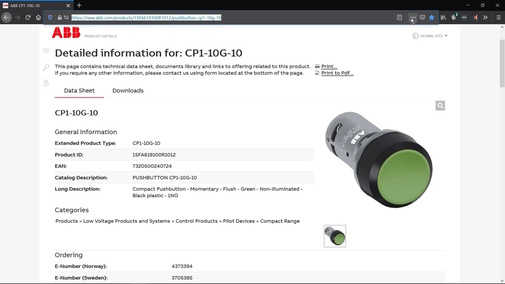
A catalogue part is a component with a part number which has been saved to the catalogue.
Unlike symbols from the symbol library, which are simply graphical representations, catalogue parts represent real-world components which have part numbers.
A catalogue part can have a part number, manufacturer, specific pin numbers, a layout image and more.
Catalogue parts are not always linked to symbols on the schematics, e.g. an end stop in a terminal strip can be assigned a catalogue part, but it will not be linked to a symbol on the schematics.
Before following this tutorial
Check the online parts catalogue to see if the part is available for download
If you wish to create/modify a catalogue part which has I/O (inputs/outputs), such as a PLC, drive, controller, etc., please follow the block generator tutorial to create/modify that part instead of this tutorial, as the block generator is specifically tailored for such components.
Creating a catalogue part
If the catalogue part would normally be linked to a symbol(s)
If the part has connection points (where wires would connect), these are the steps you should follow:
- Insert all related symbols (coil, contacts, etc.), even if you will not use some of them in your current project
- Link the symbols together so all the symbols represent the same component (you should see the same component tag above each symbol)
- Change the terminal/pin numbers on the symbols to reflect the real terminal/pin numbers on the physical component
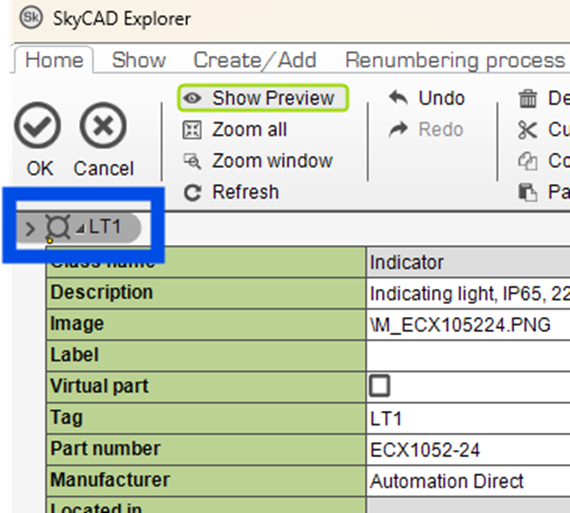
- Double-click on any of the symbols to reach the properties of the component
- Fill out the Part number property (mandatory) and other properties (optional).
Side note: if you would like to add a property, see the Catalogue Tools tutorial. - Select the heading of the component
go to the Home tab and Save - That catalogue part can now be assigned to any component of the same class. See Assigning part numbers tutorial.
If the catalogue part would never be linked to any symbol(s)
A good example of this would be a component which has no connection points, such as a door-mounted handle for a circuit breaker, an end stop for a terminal strip, or a legend plate accessory for a pushbutton.
- Add the component/accessory to the project/component/terminal strip via the Create/Add tab. Alternatively, go to the Catalogue Tools tab, select Add new catalogue part, choose the relevant class and click OK
- Explore the properties of the component
- Fill out the Part number property (mandatory) and other properties (optional)
Side note: if you would like to add a property, see the Catalogue Tools tutorial. - Select the heading of the component, go to the Home tab and Save
- That catalogue part can now be assigned to any component of the same class. See Assigning part numbers tutorial.
Modifying catalogue parts
There are two different ways to modify a catalogue part:
- Catalogue Tools -> Open Catalogue Part
- In-context
Open Catalogue Part
If you do not want the modifications to affect existing instances of this catalogue part (i.e. existing projects/systems) you must use this method to create a new revision of the catalogue part before making the modifications, so existing instances using the previous revision of the catalogue part will be unaffected.
- Go to the Catalogue Tools and select Open Catalogue Part
- Choose the class to which the catalogue part belongs and click OK
- Choose the catalogue part you wish to modify and click OK to open the catalogue part in the tree view
- If you do not want the modifications to affect existing instances of the catalogue part, close the current revision of the catalogue part, create a new revision, then make the modifications
- If you want the modifications to affect existing instances of the catalogue part, proceed to make the modifications
- Close the catalogue part in the tree view, saving the changes when prompted
If you followed step 5 above and wanted to see those changes reflected in your current project, close and re-open the project.
Tip: You can select the catalogue part, go to the Show tab and select the relevant buttons to see more information belonging to the catalogue part.
In-context
This method is best used when you want to make a minor modification to the catalogue part and do not mind the modification occurring on existing instances of the catalogue part (i.e. existing projects/systems, even if their revisions are closed).
After the catalogue part is added to a project, make the desired modifications to that catalogue part in the project, explore the properties of the component (so you can see the Part Number property), go to Home tab and choose Save.
You should see a message box saying:
“<Part Number> successfully saved.”
To update the other components of the same part number throughout your current project, close and re-open the project.
Tip: You can select the catalogue part, go to the Show tab and select the relevant buttons to see more information belonging to the catalogue part.
Related tutorials
- Assigning part numbers (2:23)
- Changing pin numbers (1:00)
- Block generator (8:22)
- Managing parts lists & BOMs (3:02)
- Catalogue tools (12:56)
- Pin-out blocks/attributes (3:00)