
Changing pin numbers
#1
Changing pin numbers
Description
This tutorial covers how to specify pin numbers on inserted symbols and components.
Topics covered
Blank component, assign part number, default pin number, change pin number, explore text, text properties, modify properties
Video version
NOTE: This tutorial video was created using an older version of SkyCAD.
Ribbon buttons' appearance and positions may differ if you're using version 1.3.25 or higher.
Thank you for your patience while we update this tutorial.
Related tutorials
Assigning part numbers (2:23)
Written version
Introduction
Note: “Pin numbers” and “Connection port names” are used synonymously in this tutorial.
“Connection port names” more accurately aligns with SkyCAD terminology.
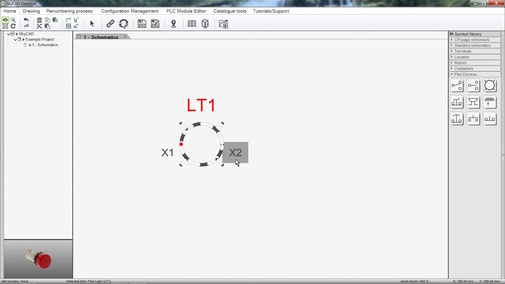
When a symbol is inserted onto the schematics, a blank component is automatically created and linked to the symbol.
Such blank components have no part number, manufacturer, layout image, etc.
Blank components do have generic connection port names (1, 2, L1, L2, A1, A2, etc.) which will be shown on the symbol, but these are usually only default, temporary connection port names, since when you assign a catalogue part to a component that catalogue part information is applied to the component that it is linked to the symbol, thereby replacing the default connection port names (1, 2, L1, L2, A1, A2, etc.) with the real-life connection port names which exist on the physical component.
It is worth noting that the connection port names will be correct only if you define them while creating the catalogue part.
Changing catalogue part connection port names
You can update the catalogue part connection port names by following these steps:
If you have already saved the catalogue part in question to your catalogue, assign that catalogue part to an appropriate component. If not, follow the Creating/modifying catalogue parts tutorial and disregard.
Double-click on a connection port name and change the Name value as desired
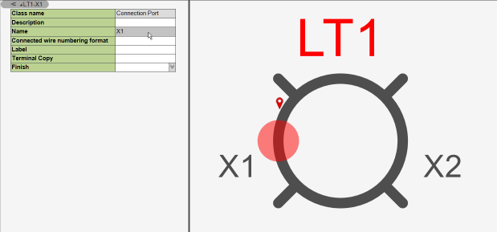
Repeat step 1 for the other connection port names as desired
To save the changes, double-click on the symbol to reach the component
Click Save from the Home tab
The next time you assign that catalogue part to a component, the connection port names will be as you saved them in the catalogue part.
Changing symbol connection port names
To change the default connection port names on a symbol:
Right-click on the symbol and choose Open Block
Go to the Drawing tab and turn on Show connection points
Double-click on a connection point and change the Default Label value as desired
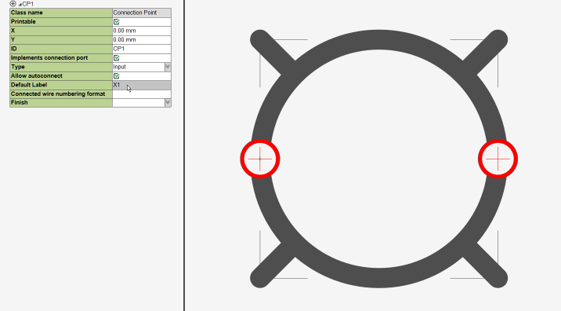
Repeat step 3 above for the remaining connection points as desired
Go to the Drawing tab and turn off Show connection points
Close and save the symbol
The next time you insert this symbol from the symbol library, it will have the updated connection port names.
Text format and position:
As with any text in SkyCAD, the text format of the connection port names can be modified by right-clicking the text and selecting Explore text, then changing the values of the relevant properties (Size, Font, etc.).
Connection port name text attributes can also be moved by clicking and dragging.
Once the desired modifications are made, right-click the symbol and select Save.
The next time you insert that symbol, it will have those modifications.